

How can everyone make task trainers using 3D printing and silicone casting alone? Here the guide to realize a facial suturing simulator
Task trainers are simple devices designed to help learners practise psychomotor skills. Over the years they proved to be a very important part of medical training, allowing students to familiarize themselves with various techniques in a safe environment. Even though there are many different types of task trainers, they all have one thing in common: a high price tag. Many institutions that cannot afford to buy them rely on educators’ creativity in making their own learning aids. Self-made trainers are usually cheap and repairable, but also their construction is time-consuming and their quality is not comparable with the commercial ones.A few months ago I started a project called Decent Simulators [www.decentsimulators.com] where I focus on designing task trainers that everyone can make using 3D printing and silicone casting alone. They are meant to be used in low resource settings, self-directed learning and remote simulation. All the models are going to be accessible online and less complicated ones will be open-sourced and available for free.
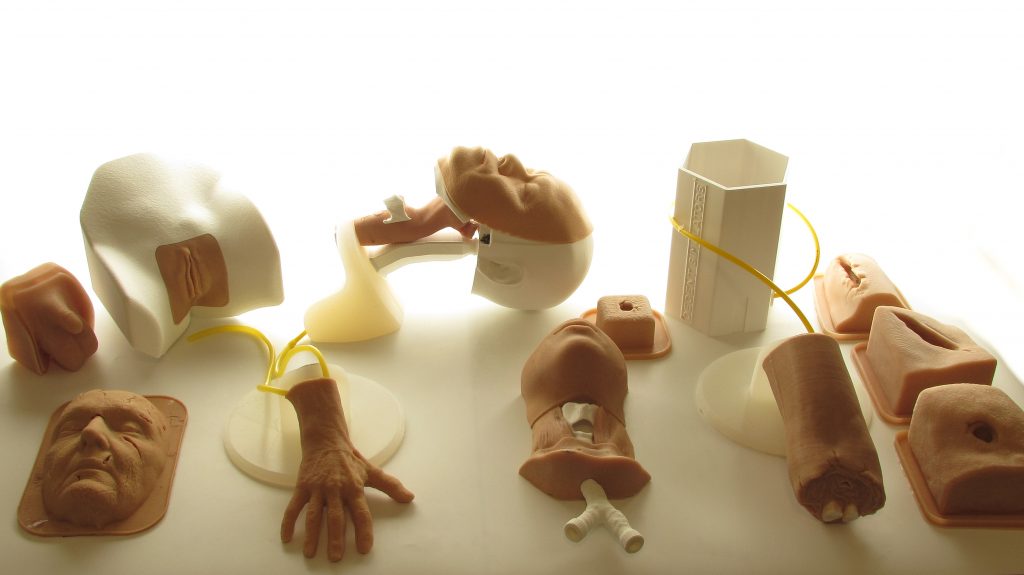
If you have no prior experience in 3D printing and silicone casting it all might seem to be a little daunting. The truth is that both processes are simpler than most people think. I will describe the whole journey it takes to make one of my task trainers, a facial suturing simulator, in 3 simple steps. It should give you a general idea about the whole process.
Step 1: 3D Printing

- Labour time: 15 minutes
- Waiting time: ~72 hours
- Material cost: 38.50 USD
- Tools used: Prusa MK3S printer, computer with PrusaSlicer software
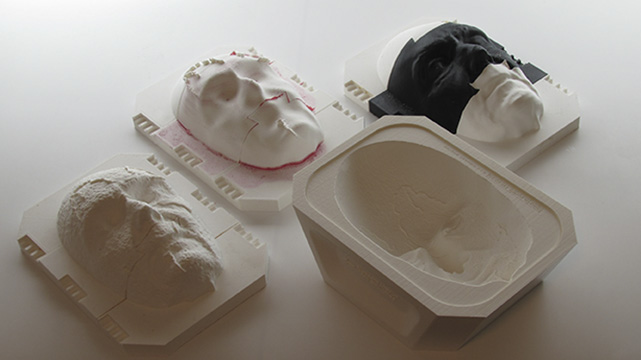
The first step of making a facial suturing task trainer is to print all the tools. The simulator was designed to have multiple layers – dermis, subcutaneous, muscle and bone – and each layer needs a separate tool. I use an MK3S printer, a cheap but powerful machine from Prusa company, and free slicing software (PrusaSlicer). PLA – the most common and easiest to use 3D printing material – is a perfect choice for this task. All the models are printed using default settings, without support structures. After 10-15 minutes spent in a slicing software, all the files are prepared.
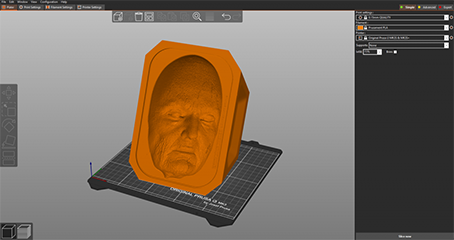
It takes me around 3 days to print all the tools, but the printing itself does not need a lot of my attention – the machine keeps working in the background while I focus on other things.

Step 2: Silicone casting

- Labour time: 26 minutes
- Waiting time: ~90 minutes
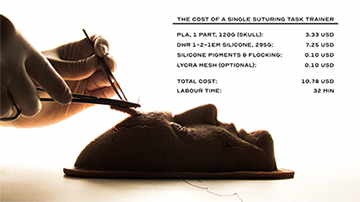
- Material cost per trainer: 10.78 USD
- Tools needed: Platinum cured silicone, spatula, plastic cup, scales, colour pigment, nylon mesh, red flocking
After all the tools are printed, it is time for silicone casting. You can find many different kinds of silicones on the market, some of them work very well for task trainers: DWR 1-2-1 A5, SmoothOn Ecoflex 00-30, PlatSil Gel-0020 and Polycraft Silskin 10 to name a few. In addition to the silicone rubber, I use a colour pigment (a standard oil paint will do) and a little bit of red flocking (which is short pieces of fabric that can be added to make the silicone skin look more realistic). All the equipment can be ordered on Amazon.
The whole process revolves around mixing two parts of silicone (platinum cured silicone comes in two parts, A and B), adding a little bit of pigment and flocking, and pouring everything into the 3D printed tool. It has to be done three times using three different tools, to achieve various tissue layers. One pour takes about 5 minutes of work followed by 30 minutes of wait (curing time depends on the silicone used, usually it is 30 minutes to 2 hours). Nylon mesh/lycra can be added to each layer to make it durable.
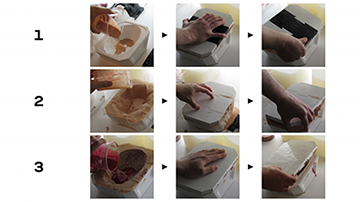
After all the layers are cured, the silicone cast can be removed from the tool.
Step 3: Post-processing

- Labour time: 6 minutes
- Tools needed: Scissors
The last part of the process is to trim the excess material. I use curved scissors – they seem to work best for this task. Now, the silicone cast can be wrapped over a fragment of a skull (also 3D printed) and… that is it. The task trainer is ready.
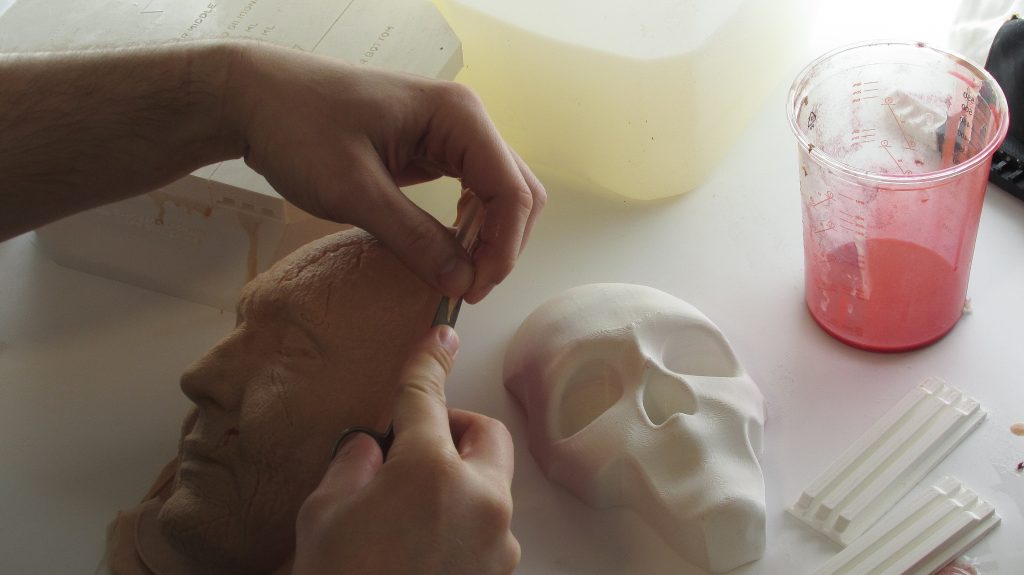
It took me a little bit over 40 minutes of labour and cost me around 50 USD (including all the 3D printed tools) to make a high quality suturing trainer. Once the tools are printed, they can be used over and over again. I always try to cast many task trainers at the same time, it allows me to make up to 20-30 simulators per day.
Others free models available here:
https://portals.wetransfer.com/portals/aa88c42b-61c3-481c-8443-f69d14d05497